What to Do After Storm Damage to Your Roof
A Complete Homeowner’s Guide
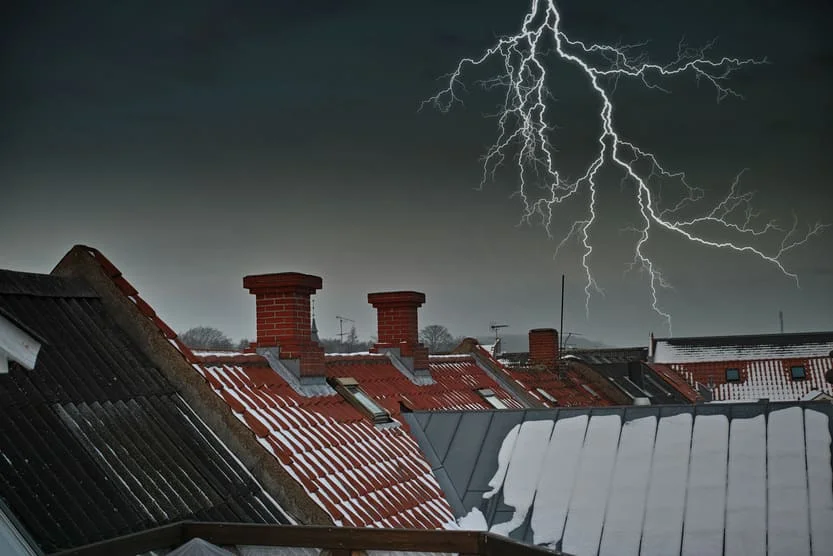
Storms don’t ask for permission. One night of heavy wind, hail, or rain can leave your roof compromised and your home exposed. If you’re dealing with storm damage to your roof, what you do next can make the difference between a simple repair and a costly disaster.
This guide walks you through exactly what to do after storm damage to your roof, step by step. It’s written for homeowners who want clarity, fast action, and the confidence to make the right decisions.
Why Acting Fast After Storm Damage Matters
Roof damage rarely stays small. What looks like a missing shingle today can turn into water intrusion tomorrow—and structural damage within weeks.
When storm damage to your roof is ignored or delayed:
- Water seeps into insulation and ceilings
- Mold begins to develop within 24–48 hours
- Electrical systems can become compromised
- Repair costs increase dramatically
The sooner you act, the more you protect your home, your investment, and your peace of mind.
Step 1: Ensure Safety First
Before inspecting anything, make sure your environment is safe.
After storm damage to your roof, hazards may include:
- Loose debris or falling branches
- Exposed electrical wires
- Slippery surfaces from rain or hail
- Structural instability
What to do immediately:
- Stay inside until the storm has fully passed
- Avoid climbing on the roof yourself
- Keep children and pets away from affected areas
- Turn off electricity if water intrusion is severe
Your safety always comes before any inspection or repair.
Step 2: Perform a Ground-Level Inspection
Once it’s safe, start by inspecting your roof from the ground.
You’re not trying to fix anything yet—just identify signs of storm damage to your roof.
Look for visible issues such as:
- Missing or lifted shingles
- Pieces of roofing material on the ground
- Dented gutters or vents (hail damage indicator)
- Fallen branches resting on the roof
- Sagging areas or uneven lines
Check inside your home:
- Water stains on ceilings or walls
- Dripping water or damp insulation
- Musty odors (early mold sign)
Take notes. These observations will be important later for insurance and contractors.
Step 3: Document the Damage Thoroughly
Documentation is critical after storm damage to your roof.
Insurance companies rely heavily on evidence, and the more detailed you are, the stronger your claim will be.
What to document:
- Photos of roof damage (from safe angles)
- Interior water damage
- Damaged personal property
- Fallen debris or tree impact points
Tips for better documentation:
- Use your phone’s timestamp feature
- Take wide shots and close-ups
- Record short videos for context
- Don’t throw away damaged materials yet
This step may feel simple, but it can save you thousands of dollars.
Step 4: Prevent Further Damage Immediately
Once storm damage to your roof is identified, your next priority is to stop things from getting worse.
Temporary protection measures:
- Place buckets under leaks
- Cover damaged areas with tarps (if safely accessible)
- Move valuables away from affected zones
- Use towels or plastic sheets to contain water
If the damage is severe, contact a roofing professional for emergency tarping services. This is often a quick and affordable way to protect your home until permanent repairs begin.
Step 5: Contact Your Insurance Company
Now that you’ve documented the storm damage to your roof, it’s time to start your claim.
When calling your insurance provider:
- Provide a clear description of the damage
- Share your documentation
- Ask about your coverage details
- Request guidance on next steps
Key questions to ask:
- Does my policy cover storm and hail damage?
- What is my deductible?
- Do I need to use approved contractors?
- How long do I have to file a claim?
Act quickly—delays can complicate or even invalidate your claim.
Step 6: Schedule a Professional Roof Inspection
Even if the damage looks minor, a professional inspection is essential.
Storm damage to your roof isn’t always visible from the ground. Hidden issues can lead to long-term problems if missed.
A roofing contractor will:
- Inspect shingles, flashing, and underlayment
- Identify hail or wind damage
- Check for structural weaknesses
- Provide a detailed damage report
This report can also support your insurance claim, giving you leverage and clarity.
Step 7: Understand Repair vs Replacement
After assessing the storm damage to your roof, you’ll face a key decision: repair or replace?
Repairs may be enough if:
- Damage is localized
- Only a few shingles are missing
- The roof is relatively new
Replacement may be necessary if:
- There is widespread damage
- Structural components are compromised
- The roof is near the end of its lifespan
A trustworthy contractor will guide you honestly—not push unnecessary work.
Step 8: Choose the Right Roofing Contractor
Not all contractors are created equal, especially after storms when “storm chasers” appear.
What to look for:
- Licensed and insured professionals
- Local presence and strong reputation
- Clear written estimates
- Experience with insurance claims
Red flags to avoid:
- Door-to-door pressure sales
- Demands for full upfront payment
- No physical business address
- Unrealistically low estimates
Choosing the right contractor ensures your roof is repaired properly—and your investment is protected.
Step 9: Navigate the Insurance Claim Process
The claim process can feel overwhelming, but understanding it makes it manageable.
Typical process:
- File your claim
- Insurance adjuster inspects your roof
- Damage assessment is completed
- Claim is approved or denied
- Payment is issued
Pro tip:
Have your contractor present during the adjuster’s inspection. They can point out damage that might otherwise be overlooked.
Step 10: Begin Repairs Quickly
Once your claim is approved, don’t delay.
Storm damage to your roof can worsen quickly, especially with changing weather.
During repairs:
- Ensure materials match your existing roof (if repairing)
- Confirm timelines and expectations
- Keep communication open with your contractor
A well-executed repair restores both safety and value to your home.
Step 11: Prevent Future Storm Damage
While you can’t control the weather, you can reduce risk.
Preventative strategies:
- Schedule annual roof inspections
- Trim overhanging tree branches
- Upgrade to impact-resistant shingles
- Reinforce flashing and sealing points
- Keep gutters clean and functional
Prevention is always more affordable than repair.
Common Types of Storm Damage to Your Roof
Understanding damage types helps you recognize problems faster.
Wind Damage
- Missing or curled shingles
- Lifted edges exposing underlayment
Hail Damage
- Dents or cracks in shingles
- Granule loss (affects lifespan)
Water Damage
- Leaks and stains
- Mold and rot
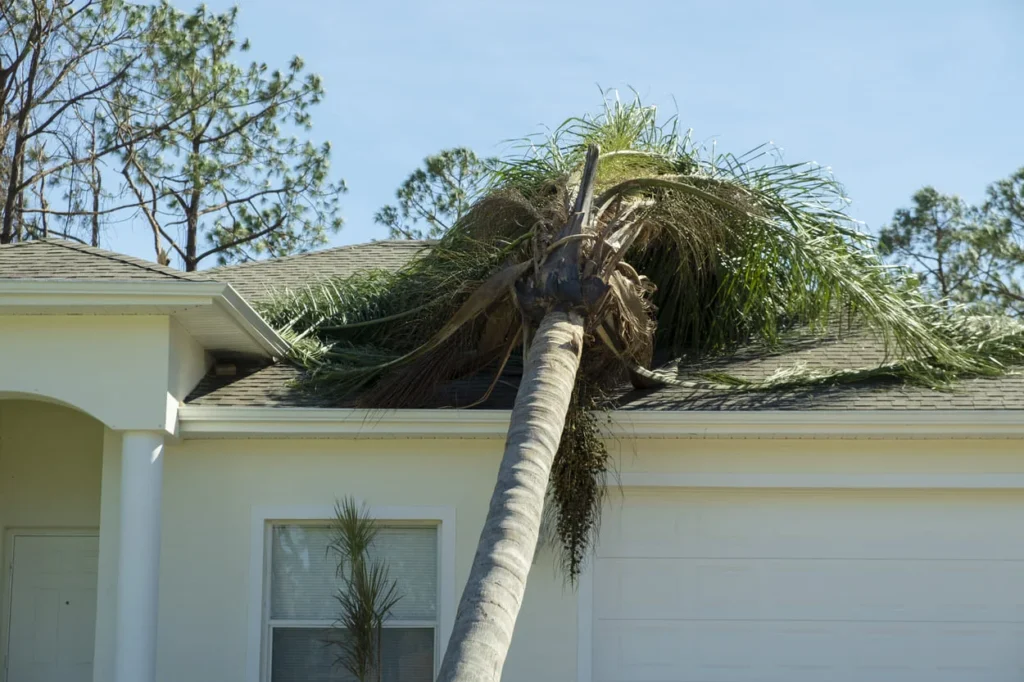
Debris Damage
- Punctures from branches
- Structural impact points
Each type requires a different repair approach, which is why professional evaluation matters.
How Much Does It Cost to Fix Storm Damage?
Costs vary depending on severity.
Average ranges:
- Minor repairs: $200 – $1,000
- Moderate damage: $1,000 – $5,000
- Full replacement: $7,000 – $15,000+
Insurance often covers a significant portion, but your deductible will apply.
Mistakes to Avoid After Storm Damage
Many homeowners unintentionally make costly errors.
Avoid these common mistakes:
- Waiting too long to act
- Skipping documentation
- Attempting DIY roof repairs
- Hiring unverified contractors
- Ignoring minor damage
Every one of these can increase long-term costs.
When to Call for Emergency Roofing Services
Some situations require immediate professional help.
Call emergency services if:
- Water is actively entering your home
- Large sections of the roof are missing
- Structural sagging is visible
- A tree has impacted your roof
Emergency response can prevent catastrophic damage.
Take Control After the Storm
Storm damage can feel overwhelming, but having a clear plan puts you back in control.
When dealing with storm damage to your roof, remember:
- Act quickly but safely
- Document everything
- Work with professionals
- Stay proactive with maintenance
Your roof protects everything beneath it. Taking the right steps now ensures your home stays safe, secure, and strong for years to come.
Need Help With Roof Storm Damage?
If your roof has been affected by a recent storm, don’t wait until the damage gets worse.
A fast response now can save you thousands later—and give you peace of mind when the next storm rolls in.